Although you can freely define panel layouts in PanelNinja itself (learn about adding panels in Managing Instruments and Panels), it is also possible to define a custom panel layout to distribute as a ZIP file for anyone to import into PanelNinja.
A custom panel contains three elements:
- A configuration file
- An optional thumbnail image of the panel which is displayed in PanelNinja
- An set of custom instruments included in the panel layout
Custom panels can be laid out in a grid with an arbitrary number of rows and columns.
The maximum number of rows supported is 4 and the maximum number of columns is 6.
We will learn how to construct an instrument by walking through the construction of the default Default Panel panel included with PanelNinja. You can download a copy for yourself using the Save button for that instrument on the Manage Instruments screen.
The Configuration File
A config.json configuration file is required when creating a custom panel package. This file is quite simple. The following example is from the Default Panel included in PanelNinja:
{
    "name": "Default Panel",
    "author": "FlightSim Ninja",
    "url": "https://flightsim.ninja/",
    "thumbnail": "default.png",
    "credit": "This panel layout was created by PanelNinja and is included as the default GA panel layout.",
    "description": "Default GA panel provided with PanelNinja",
    "license": "This instrument is distributed with PanelNinja but may be reused freely -- including editing it to create your own instruments which you can then distribute",
    "cols": 3,
    "rows": 2,
    "layout": [
        [
            {
                "instrument": "fsn-heading",
                "size": "standard"
            },
            {
                "instrument": "fsn-horizon",
                "size": "standard"
            },
            {
                "instrument": "fsn-vertspeed",
                "size": "standard"
            }
        ],
        [
            {
                "instrument": "fsn-turncoord",
                "size": "standard"
            },
            {
                "instrument": "fsn-altimeter",
                "size": "standard"
            },
            {
                "instrument": "fsn-airspeed",
                "size": "standard"
            }
        ]
    ]
}
There are eight properties which can be included in this configuration file:
| Property | Description |
| name | The name of the panel to display in PanelNinja: |
| url | The full URL (including protocol) for the panel or author's web site: |
| thumbnail | The file name of a thumbnail image included in the panel package to be displayed in PanelNinja: |
| credit | Any credits or acknowledgements the panel author needs to provide (for instance if reusing third-party open/free content or code): Note: If you need to include links to external web sites in this text, refer to the section below "Creating External Links in Meta Data". Note: If you need to include links to external web sites in this text, refer to the section below "Creating External Links in Meta Data". |
| description | The description of the panel to display in PanelNinja: Note: If you need to include links to external web sites in this text, refer to the section below "Creating External Links in Meta Data". Note: If you need to include links to external web sites in this text, refer to the section below "Creating External Links in Meta Data". |
| license | Any license information you want/need to include in the panel. This will not be displayed in PanelNinja but is available for anyone referring to the contents of your image package. |
| cols | The number of columns in the instrument layout grid. |
| rows | The number of rows in the instrument layout grid. |
| layout | An array defining the instruments displayed in the rows and columns of your panel layout grid. |
Creating External Links in Meta Data
The credits and description fields can support standard HTML such as <em> and <strong> elements. However, you cannot use the standard <a href="some url"> element to create links to external web sites.
Instead, you can use the following HTML in these fields to create links to external web sites:
<span class='browser' pnurl='link url>link text</span>
For instance, in the examples above credits field contains a link to the FlightSim Ninja web site:
<span class='browser' pnurl='https://flightsim.ninja/'>FlightSim Ninja</span>
Defining your instrument layout
The layout property defines your panel layout as a two-tier set of arrays:
- The outer array container an entry per row
- Each entry in turn is another array containing an entry per column
- Each of these entries in turn is an object containing the following properties:
- instrument: the name of the instrument to place in the position - the name is the name of the instrument's folder (this value is not included if size is set to skip)
- size: the size of the instrument panel's slot; valid values are:
- standard: a standard instrument slot
- double: a double-size instrument slow which takes up 2 columns and rows
- skip: an instrument slot which is not used because it's position is taken up by a double-sized slot
Example of an instrument layout
To illustrate defining a layout, let's define this layout:

To start, we need to define the grid as four columns and two rows -- the large horizon instrument in the middle takes up two columns. To do this we include the following two values in our JSON:
"cols": 4,
"rows": 2
Next we will create the layout arrays without filling in the values:
"layout": [
    [
        {
        },
        {
        },
        {
        },
        {
        }
    ],
    [
        {
        },
        {
        },
        {
        },
        {
        }
    ]
]
This creates the layout value with an array of two elements for each row and each of those in turn is an array of four objects -- one for each column.
The layout we want to create will contain the following instruments:

The grid itself is organised as follows -- taking into account that the double-sized instrument takes up four slots (two rows and columns) and that three of those we will mark to be skipped:

This results in a layout definition as follows:
"layout": [
    [
        {
            "instrument": "fsn-heading",
            "size": "standard"
        },
        {
            "instrument": "fsn-horizon",
            "size": "double"
        },
        {
            "size": "skip"
        },
        {
            "instrument": "fsn-vertspeed",
            "size": "standard"
        }
    ],
    [
        {
            "instrument": "fsn-altimeter",
            "size": "standard"
        },
        {
            "size": "skip"
        },
        {
            "size": "skip"
        },
        {
            "instrument": "fsn-airspeed",
            "size": "standard"
        }
    ]
]
Bundling Instruments in a Panel Package
You can bundle one or more instruments in your panel package to easily distribute a set of instruments along with a panel layout in a single package file. This is done by creating an instruments sub-folder in your panel package's main folder and then include each instrument in a folder of its own -- including all the instrument package files (learn more about creating Instruments in Creating Custom Instruments).
For instance, in a package including the default PanelNinja panel layout and the default six instruments included in with PanelNinja, the panel package folder structure would look like this:

Note how the instrument folder names match the entries in the instruments property array in the configuration file.
In turn, each instrument folder will contain the instrument files as outlined in Creating Custom Instruments:
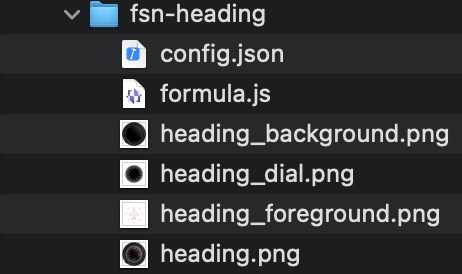
Packaging a Panel For Distribution
Panels need to be packaged into a ZIP file containing all their files for distribution as stand-alone panel packages. The Import Panel function of the Manage Instruments screen in PanelNinja expects the panel file to be a ZIP file.
In general you keep the configuration file and thumbnail image at the top of the folder structure and then include the instruments folder as discussed above.
You can then ZIP the files and folders recursively to end up with a ZIP file with contents that look like this:
Archive:  ../fsn-default.zip
  Length      Date    Time    Name
---------  ---------- -----   ----
      480  08-26-2021 08:09   config.json
    40940  08-26-2021 08:09   default.png
        0  08-28-2021 13:29   instruments/
        0  08-25-2021 23:11   instruments/fsn-horizon/
      464  08-25-2021 23:11   instruments/fsn-horizon/outerdial.js
    36909  08-25-2021 23:11   instruments/fsn-horizon/horizon.png
     3042  08-25-2021 23:11   instruments/fsn-horizon/config.json
    99299  08-25-2021 23:11   instruments/fsn-horizon/horizon_background.png
      964  08-25-2021 23:11   instruments/fsn-horizon/background_pitch.js
    23922  08-25-2021 23:11   instruments/fsn-horizon/horizon_outerdial.png
    47183  08-25-2021 23:11   instruments/fsn-horizon/horizon_foreground.png
        0  08-25-2021 23:11   instruments/fsn-vertspeed/
    30287  08-25-2021 23:11   instruments/fsn-vertspeed/vertspeed.png
    56746  08-25-2021 23:11   instruments/fsn-vertspeed/vs_dial.png
     2389  08-25-2021 23:11   instruments/fsn-vertspeed/config.json
     2213  08-25-2021 23:11   instruments/fsn-vertspeed/vs_dial_pointer.png
      753  08-25-2021 23:11   instruments/fsn-vertspeed/formula.js
        0  08-25-2021 23:11   instruments/fsn-airspeed/
     2828  08-25-2021 23:11   instruments/fsn-airspeed/config.json
     2052  08-25-2021 23:11   instruments/fsn-airspeed/formula.js
    66173  08-25-2021 23:11   instruments/fsn-airspeed/airspeed_background.png
    37787  08-25-2021 23:11   instruments/fsn-airspeed/airspeed.png
     2675  08-25-2021 23:11   instruments/fsn-airspeed/airspeed_dial.png
        0  08-25-2021 23:11   instruments/fsn-altimeter/
     3563  08-25-2021 23:11   instruments/fsn-altimeter/altimeter_pointer_1000.png
      527  08-25-2021 23:11   instruments/fsn-altimeter/pointer_1000.js
      607  08-25-2021 23:11   instruments/fsn-altimeter/crosshatch.js
    13977  08-25-2021 23:11   instruments/fsn-altimeter/altimeter_centre_background.png
     7079  08-25-2021 23:11   instruments/fsn-altimeter/config.json
     2601  08-25-2021 23:11   instruments/fsn-altimeter/altimeter_pointer_100.png
    35951  08-25-2021 23:11   instruments/fsn-altimeter/altimeter_outer_rim.png
     3820  08-25-2021 23:11   instruments/fsn-altimeter/altimeter_crosshatch.png
      523  08-25-2021 23:11   instruments/fsn-altimeter/pointer_100.js
    67002  08-25-2021 23:11   instruments/fsn-altimeter/altimeter_barometer.png
    35505  08-25-2021 23:11   instruments/fsn-altimeter/altimeter.png
    12729  08-25-2021 23:11   instruments/fsn-altimeter/altimeter_dial.png
      535  08-25-2021 23:11   instruments/fsn-altimeter/pointer_10000.js
     1627  08-25-2021 23:11   instruments/fsn-altimeter/altimeter_pointer_10000.png
    10265  08-25-2021 23:11   instruments/fsn-altimeter/altimeter_barometer_overlay.png
        0  08-25-2021 23:11   instruments/fsn-turncoord/
      904  08-25-2021 23:11   instruments/fsn-turncoord/slip.js
    56581  08-25-2021 23:11   instruments/fsn-turncoord/turncoord_background.png
     3211  08-25-2021 23:11   instruments/fsn-turncoord/turncoord_slip.png
      644  08-25-2021 23:11   instruments/fsn-turncoord/bank.js
     3685  08-25-2021 23:11   instruments/fsn-turncoord/config.json
     7659  08-25-2021 23:11   instruments/fsn-turncoord/turncoord_foreground.png
    35815  08-25-2021 23:11   instruments/fsn-turncoord/turncoord.png
     2608  08-25-2021 23:11   instruments/fsn-turncoord/turncoord_bank.png
        0  08-25-2021 23:11   instruments/fsn-heading/
     3346  08-28-2021 12:39   instruments/fsn-heading/config.json
    55162  08-25-2021 23:11   instruments/fsn-heading/heading.png
      961  08-28-2021 13:07   instruments/fsn-heading/formula.js
    11096  08-25-2021 23:11   instruments/fsn-heading/heading_foreground.png
    32999  08-25-2021 23:11   instruments/fsn-heading/heading_dial.png
    59022  08-25-2021 23:11   instruments/fsn-heading/heading_background.png
You can then import the panel into PanelNinja and use it. The individual instruments will also become available for use in other panel layouts you define in PanelNinja.